In this tutorial, we will be creating an infinitely, procedurally generated, map with Phaser 3. You can visit Phaser’s official website to find out more information about Phaser.
Tutorial Requirements
- Basic to intermediate knowledge of JavaScript
- Web server
- Tutorial assets
- Code editor (not required, but highly recommended)
Ensure a Web Server is Set Up
Although Phaser games are ran in the browser, unfortunately you can’t just run a local HTML file directly from your file system. When requesting files over http, the security of the server only allows you to access files you’re allowed to. When loading a file from the local file system (the file:// protocol), your browser highly restricts it for obvious security reasons. It’s no good to allow code on a website to read anything in your raw file system. Because of this, we will need to host our game on a local web server.
We recommend checking out Phaser’s official guide, “Getting Started with Phaser 3”, to learn which web server is compatible with your system and there are links to each one. The guide also provides some detailed summaries on each of the various web servers mentioned.
Create the Folders and Files Needed
First, find the directory where your web server hosts files from (WAMP Server, for example, hosts files from the www directory within it’s installation folder at C:/wamp64.) Once you have found the location, create a new folder inside it and call it anything you want.
Next, enter the folder and create a new file called, “index.html”. Our index file is where we will declare the location of our Phaser script and the rest of our game scripts.
We also need to create two folders, I called the first one content for our project’s content (just sprites for this tutorial), and another one, js, which will contain the scripts for our game. Feel free to name these two folders anything you wish. One of the folders just needs to contain the content for our project, and the other for JavaScript files. Since we have our folder for content and JavaScript, create three new files inside the newly created folder for JavaScript: Entities.js, SceneMain.js and game.js. I will explain what those files do shortly, but first we need to add the content to our content folder.
So far, the file structure should look like:
To add content to this project, we first need content. I have pre-made some assets for this course, which can be downloaded here.
Content needed:
Sprites (images)
- sprGrass.png
- sprSand.png
- sprWater.png (animation, multiple frames in a horizontal strip)
Once you have downloaded the assets (or made your own), we will move those files into the content directory we made.
One of the last steps we need to do before jumping in, is downloading the latest Phaser script. A common method of acquiring this (there are multiple), is to head over to GitHub (specifically here) and download the script meant for distribution. You can pick either phaser.js or phaser.min.js. The phaser.js file contains the source code for Phaser in a readable form, which is useful for contributing to Phaser, or just to understand how something works under-the-hood. The other file, phaser.min.js is meant for distribution, and is compressed to reduced file size. For our purposes, it won’t really matter which one we download, though I will use phaser.js. Click the the link of either script, and you will be greeted by a page that displays a “View raw” button, near the center of the page, about halfway down. Next, click the “View raw” link, then right click anywhere on the page of code that appears. There should be dropdown menu that appears after right clicking where you can then click “Save Page As” or something similar. A save dialog should appear where you can save the Phaser file to the JavaScript directory we created earlier.
Now it’s time for the last step before we start programming. For this tutorial we will be using what is called, Perlin noise. Don’t worry about what that means right now. The only thing we need at this point is a JavaScript library that can provide some functions to generate 2D Perlin noise. The library we will specifically use can be found on GitHub here. Visit the link, and click the green “Clone or download” button, then click the “Download ZIP”. Extract the folder, then copy the “noisejs-master” folder into the JavaScript folder we created.
Now we can finally jump right in to the code! The first file we will add to is index.html. Let’s define the markup for our HTML file, where we will define our scripts.
<!DOCTYPE html>
<html>
    <head>
        <meta charset=”utf-8”>
        <meta lang=”en-us”>
        <title>Infinite Terrain</title>
    </head>

    <body>
        <script src=”js/phaser.js”></script>
        <script src=”js/noisejs-master/perlin.js”></script>
        <script src=”js/Entities.js”></script>
        <script src=”js/SceneMain.js”></script>
        <script src=”js/game.js”></script>
    </body>
</html>
Next, we can head over to game.js, and define the configuration we want Phaser to create a game with. In the game.js file, let’s add the following:
var config = {
    type: Phaser.WEBGL,
    width: 640,
    height: 640,
    backgroundColor: “black”,
    physics: {
        default: “arcade”,
        arcade: {
            Gravity: { x: 0, y: 0 }
        }
    },
    scene: [
        SceneMain
    ],
    pixelArt: true,
    roundPixels: true
};

var game = new Phaser.Game(config);
Next, let’s go to the Entities.js file. When we generate infinite terrain, we will not be storing an array of all the tiles in the map. Storing each tile individually would not be scalable, it would crash the browser after moving over enough terrain, and it would be impossible to store it in the browser. Instead, we will be using a chunk system. If you’ve ever played Minecraft, you will probably know that chunks of blocks are loaded around the player. When the player moves out of the range of a loaded chunk, the chunk is the unloaded. We will be building a very similar system in this tutorial. To start, we can create an object that represents a chunk. To do this, we will be using the ES6 class syntax, which is essentially syntactic sugar of a normal JavaScript object. Classes are useful for organizing the structure of an object, and provides an easy way of adding functions.
Let’s start by adding the chunk class and also give it a constructor. The constructor should take in three parameters: scene, x, and y:
class Chunk {
    constructor(scene, x, y) {

    }
}
By default, scene, x, and y will not be stored in an instance of this class. To store it, we can simply assign the parameters to the instance of the class by using the this keyword. The this keyword means the current instance that’s having it’s code interpreted. Inside the constructor, add the following:
this.scene = scene;
this.x = x;
this.y = y;
Each chunk will contain a Phaser group, which will store all of the tiles for that specific chunk. We will also want to add a boolean property which will determine whether the chunk is loaded or not. Let’s add a couple more lines to our constructor:
this.tiles = this.scene.add.group();
this.isLoaded = false;
There are two more functions we want to define in our Chunk class: unload, and load. We will start with unload. After the constructor, but still within the Chunk class, add the following:
unload() {
    if (this.isLoaded) {
        this.tiles.clear(true, true);

        this.isLoaded = false;
    }
}
When unload is called, the chunk will check if it is loaded, if so, remove all the tiles from the group and set the state of isLoaded to false for that chunk.
The next function we need to create is load. This function will create the tiles for the chunk, if the chunk is not loaded already. When creating the tiles, we will also be generating the Perlin noise value for the X and Y position of that specific tile. We can then check if the value is between various ranges and we generate different terrain tiles accordingly. First we’ll start by creating the load function, and creating the condition which checks if the chunk is not loaded:
load() {
    if (!this.isLoaded) {

    }
}
Next we will want to iterate through each X and Y tile position in the chunk. We will set a property in SceneMain which will determine the chunk size and tile size but for now, add the following inside the if statement:
for (var x = 0; x < this.scene.chunkSize; x++) {
for (var y = 0; y < this.scene.chunkSize; y++) {
}
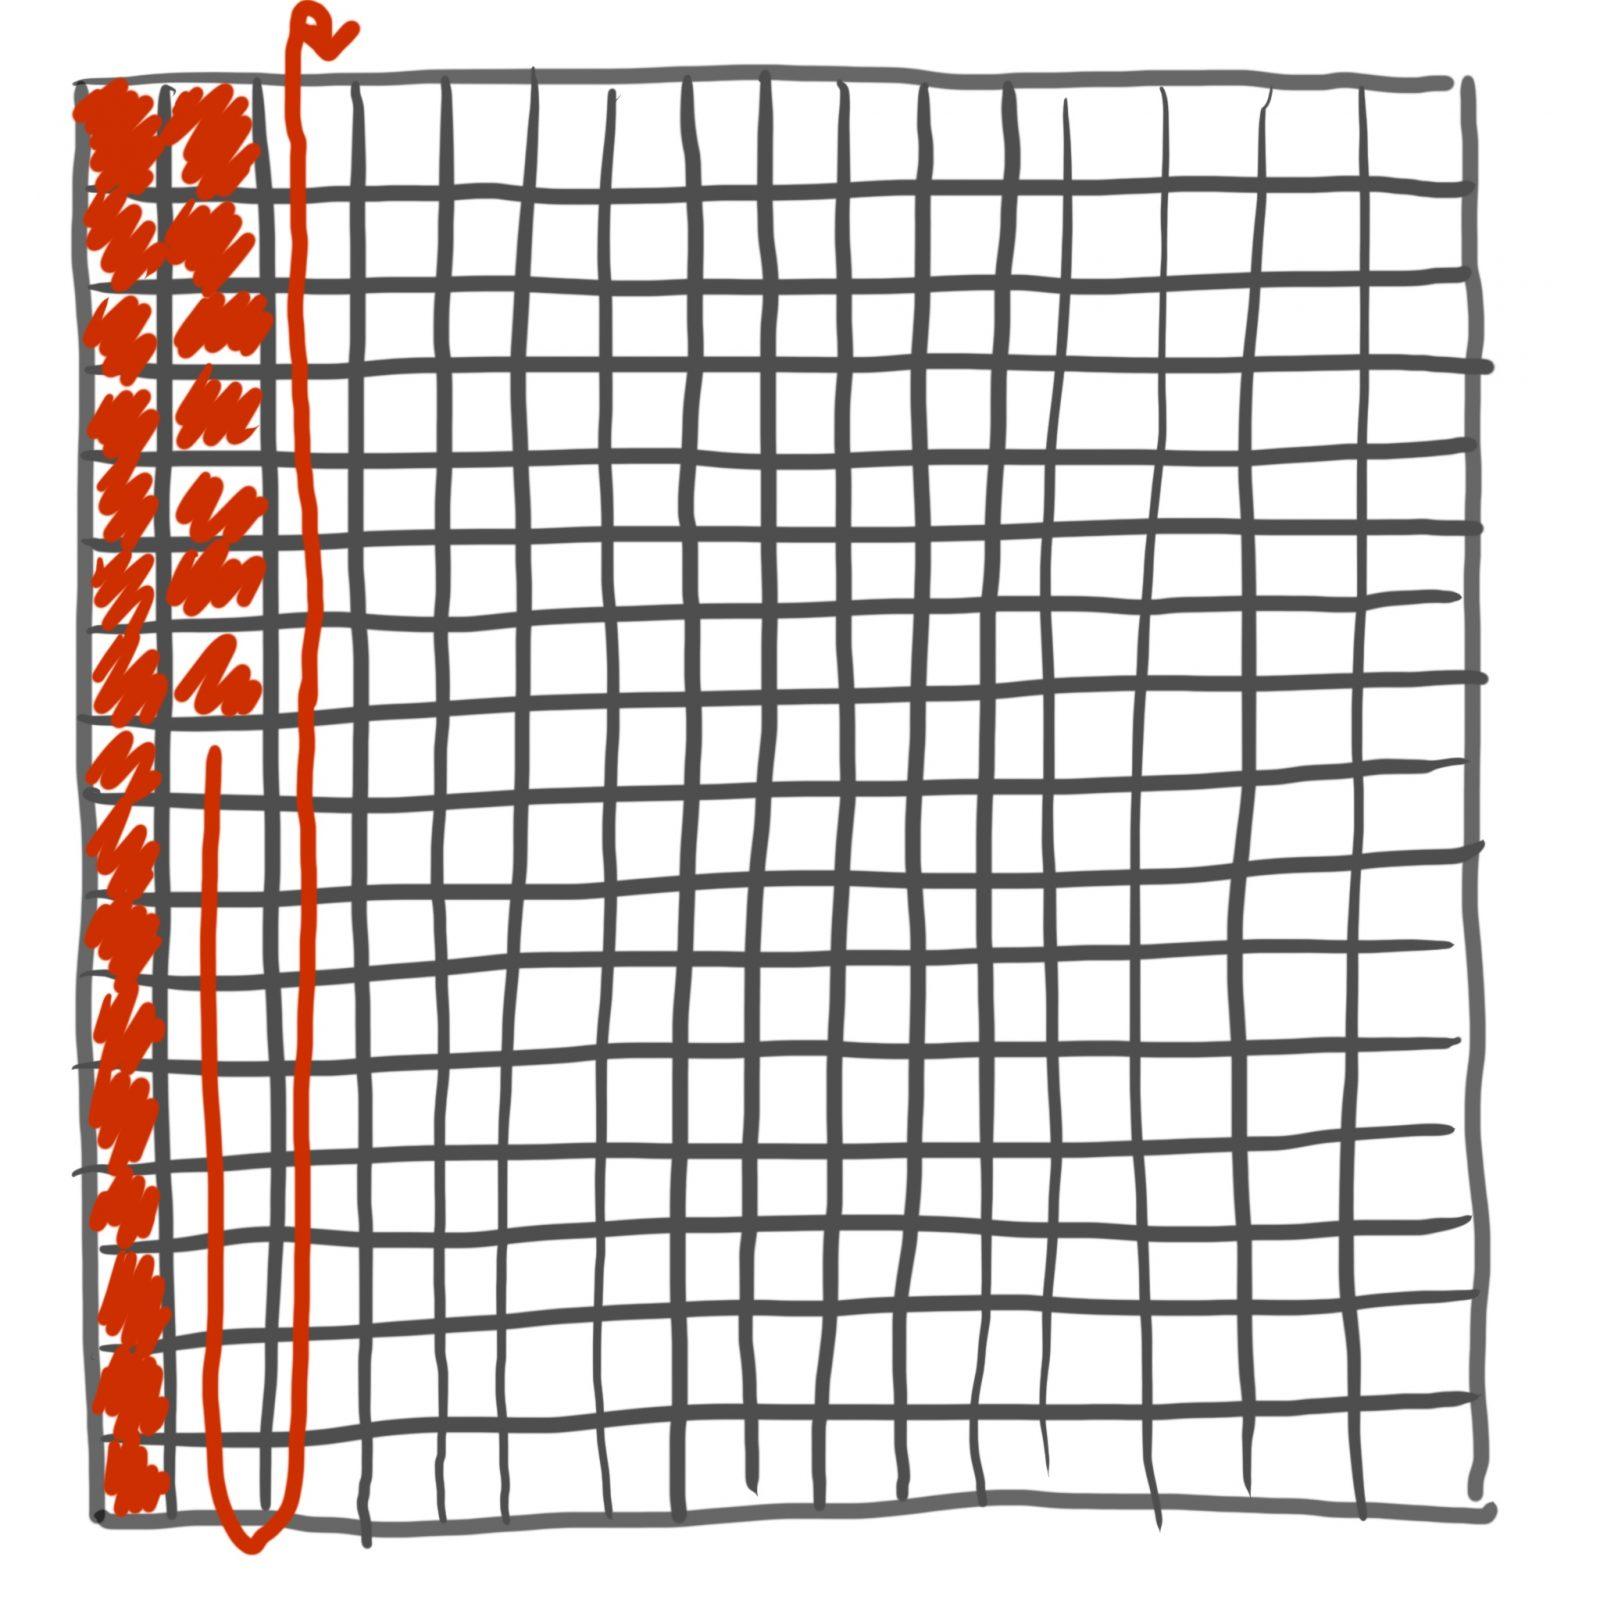
}Basically, once each tile in the current column is created, then it moves on to the next column and create all the tiles in that column, etc. Here’s a very crude diagram to help visualize this:
The next step to create our tiles, is to define two variables which will hold the X position, and Y position of the tile, respectively. Add the following inside the second for loop:
var tileX = (this.x * (this.scene.chunkSize * this.scene.tileSize)) + (x * this.scene.tileSize);
var tileY = (this.y * (this.scene.chunkSize * this.scene.tileSize)) + (y * this.scene.tileSize);
Now is the (most?) fun part. It’s time to generate our perlin noise value. Add the following code after the above two variables we declared:
var perlinValue = noise.perlin2(tileX / 100, tileY / 100);Feel free to change the value we divide by, in this case I used 100, but you can try 50, or 1000, or anything. Pretty much all that value does is determine how zoomed-in the Perlin noise is.
Underneath that, add a local variable for determining the image key, as well as one for setting the optional animation key:
var key = “”;
var animationKey = “”;
Now that we’ve generate a perlin noise value, we can check decimal ranges to determine what tile we want to create. Add this next code block under our previous line:
if (perlinValue < 0.2) {
    key = “sprWater”;
    animationKey = “sprWater”;
}
else if (perlinValue >= 0.2 && perlinValue < 0.3) {
    key = “sprSand”;
}
else if (perlinValue >= 0.3) {
    key = “sprGrass”;
}
Now we can finally create the instance of the tile and add it to the tiles group. If an animation key is set, also play the animation specified by the animation key. Add the following under the last bit of code:
var tile = new Tile(this.scene, tileX, tileY, key);

if (animationKey !== “”) {
    tile.play(animationKey);
}

this.tiles.add(tile);
To finish up, let’s set our chunk to be loaded just after both for loops, but still within the not loaded condition:
this.isLoaded = true;When loading is completed for a chunk, we want to set it’s isLoaded value to true.
We can now move on to the Tile class. The Tile class will just extend a Phaser sprite for now, but it could be handy for adding interaction, or special properties to your tiles in the future. Let’s add our tile class:
class Tile extends Phaser.GameObjects.Sprite {
    constructor(scene, x, y, key) {
        super(scene, x, y, key);
        this.scene = scene;
        this.scene.add.existing(this);
        this.setOrigin(0);
    }
}
Inside the constructor, we ensure that a tile instance will be added to the display list of the current Scene. We also set the origin to the top left corner. The cool thing about the setOrigin method is we only have to type the first parameter if we want a value to apply to both the X and Y axis Great! We are now finished with the Entities.js file.
Let’s hop on over to SceneMain.js. The first thing we want to do in this file is declare our class, SceneMain, which should extend Phaser.Scene:
class SceneMain extends Phaser.Scene {

}
The next thing we want to do is add our constructor as well as four functions we will be using:
constructor() {
    super({ key: “SceneMain” });
}

preload() {

}

create() {

}

getChunk(x, y) {

}

update() {

}
Starting with the preload function, let’s add the loading code for our three image files:
this.load.spritesheet(“sprWater”, “content/sprWater.png”, {
    frameWidth: 16,
    frameHeight: 16
});
this.load.image(“sprSand”, “content/sprSand.png”);
this.load.image(“sprGrass”, “content/sprGrass.png”);
We are now finished loading our project’s content! The next step is to fill in the create function. Inside the create function, add the following:
this.anims.create({
    key: “sprWater”,
    frames: this.anims.generateFrameNumbers(“sprWater”),
    frameRate: 5,
    repeat: -1
});

this.chunkSize = 16;
this.tileSize = 16;
this.cameraSpeed = 10;

this.cameras.main.setZoom(2);

this.followPoint = new Phaser.Math.Vector2(
    this.cameras.main.worldView.x + (this.cameras.main.worldView.width * 0.5),
    this.cameras.main.worldView.y + (this.cameras.main.worldView.height * 0.5)
);

this.chunks = [];

this.keyW = this.input.keyboard.addKey(Phaser.Input.Keyboard.KeyCodes.W);
this.keyS = this.input.keyboard.addKey(Phaser.Input.Keyboard.KeyCodes.S);
this.keyA = this.input.keyboard.addKey(Phaser.Input.Keyboard.KeyCodes.A);
this.keyD = this.input.keyboard.addKey(Phaser.Input.Keyboard.KeyCodes.D);
The first thing we do in the code above is create the animation for our water tile. We are also creating three properties. The property, chunkSize, defines the size of a chunk by the amount of tiles for both the width and height of the chunk. Since chunkSize is currently set to 16, the chunk would be 16 tiles in width, and 16 tiles in height. The next thing we do in the create function is set the zoom level of the camera. I have set the zoom to 2X the default. I also created a two-dimensional vector (it’s a useful object for defining X and Y positions in graphical programming). This 2D vector contains the X and Y values for what I call the “follow point”. The follow point will be used as the point in which the camera will be centered on. In a normal game, you could center the camera on the player sprite instead. However, since in this project we’re strictly covering just the mechanics of an infinite procedural terrain generator, I will leave adding the player as an exercise for the reader. 🙂 We are also adding four properties which will soon be used for checking if the corresponding key is down. The four properties are for the W key, S key, A key, and D key.
We can now take a look at the getChunk function. The getChunk function will be extremely useful for getting the chunk at a certain chunk position. Inside the getChunk function, add the following to retrieve the chunk at a specific X, Y, position:
var chunk = null;
for (var i = 0; i < this.chunks.length; i++) {
    if (this.chunks[i].x == x && this.chunks[i].y == y) {
        chunk = this.chunks[i];
    }
}
return chunk;
Great! Now we can now fill in the update function. Before proceeding, the update function will contain quite a bit of code. The sequence of instructions the update function will execute each frame is the following:
- Get the chunk position that the follow point is in.
- Create chunks around the follow point if they don’t exist.
- Load chunks around the follow point if they do exist. Also if a chunk exists, but is outside a certain radius of chunks, unload the chunk.
- Move the camera in the corresponding direction based on the key that’s down.
- Center the camera on the follow point.
We’ll first start with getting the chunk position the follow point is in. Knowing the chunk position that the follow point is in is critical because our chunk creation and chunk loading all happens relative to the chunk the follow point is in. We will essentially be snapping the position of the follow point to a grid, with each cell being the size of the chunk as a world position. We then divide that number down by the chunk size and tile size so we get our proper chunk position. Add the following code to the update function:
var snappedChunkX = (this.chunkSize * this.tileSize) * Math.round(this.followPoint.x / (this.chunkSize * this.tileSize));
var snappedChunkY = (this.chunkSize * this.tileSize) * Math.round(this.followPoint.y / (this.chunkSize * this.tileSize));

snappedChunkX = snappedChunkX / this.chunkSize / this.tileSize;
snappedChunkY = snappedChunkY / this.chunkSize / this.tileSize;
This code retrieves the chunk position that the follow point is in. The next portion of code will create chunks around this chunk position if they do not exist yet. Add the following block of code:
for (var x = snappedChunkX - 2; x < snappedChunkX + 2; x++) {
    for (var y = snappedChunkY - 2; y < snappedChunkY + 2; y++) {
        var existingChunk = this.getChunk(x, y);

        if (existingChunk == null) {
            var newChunk = new Chunk(this, x, y);
            this.chunks.push(newChunk);
        }
    }
}
The above code creates chunks in a radius of two chunks around the follow point. The next step is to add in the chunk loading and unloading logic. Add the following block under the previous:
for (var i = 0; i < this.chunks.length; i++) {
    var chunk = this.chunks[i];

    if (Phaser.Math.Distance.Between(
        snappedChunkX,
        snappedChunkY,
        chunk.x,
        chunk.y
    ) < 3) {
        if (chunk !== null) {
            chunk.load();
        }
    }
    else {
        if (chunk !== null) {
            chunk.unload();
        }
    }
}
The last part to this infinite terrain generation tutorial is adding in the camera movement and centering the camera on the follow point. Let’s add the following code to add camera movement.
if (this.keyW.isDown) {
    this.followPoint.y -= this.cameraSpeed;
}
if (this.keyS.isDown) {
    this.followPoint.y += this.cameraSpeed;
}
if (this.keyA.isDown) {
    this.followPoint.x -= this.cameraSpeed;
}
if (this.keyD.isDown) {
    this.followPoint.x += this.cameraSpeed;
}
To center the camera, it’s an easy one-liner:
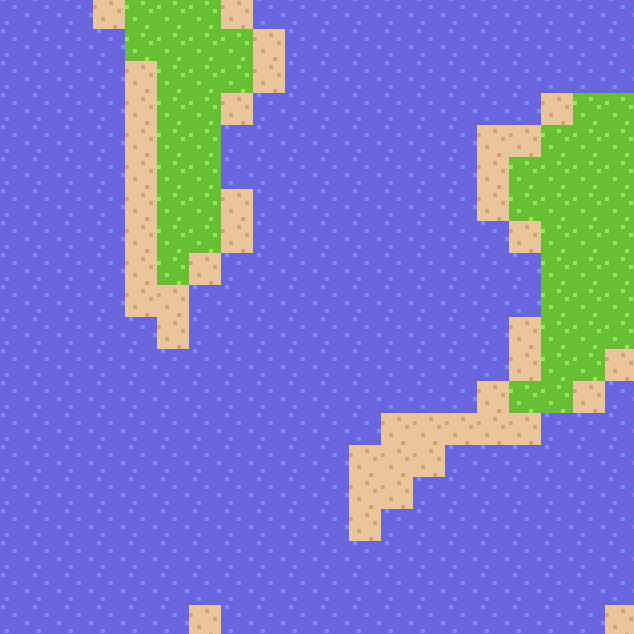
this.cameras.main.centerOn(this.followPoint.x, this.followPoint.y);There we have it! If we navigate to our page in the browser, we should something like the this:
This concludes this tutorial on infinite procedural terrain generation! The final code for this tutorial can be found on GitHub. I’m looking forward to hearing your comments, suggestions, and feedback on this tutorial. Feel free to email me at [email protected]. I would love to hear what you can do with this. I could see this code easily be adapted for an RPG game, or a game similar to Minicraft, etc. If you build something cool with this, tweet it at me! My Twitter handle is @jaredyork_. If you would like to hear about more of our tutorials and courses, be sure to fill out the form.